Sunday, March 31, 2013

Using Sketchup for 3D Printing Design

First, I want to say that I am by no means an expert in the area of 3d printing, having only been doing this for a couple of months.  But since this technology is so interesting, I thought I would keep posting my experiences here, so that others interested in becoming more knowledgeable might learn a thing or two reading about what I am doing.  Or others helping me to learn more from their experiences.

The great part about 3d printing is that it can be free to get started.  I use Sketchup for my designs, which is a free download from Trimble.  There is a huge online community, and plenty of resources available for the newcomer.  Once the design is ready for printing, there are multiple printing services available to print the finished model.  For N scale, however, it seems that the best choice is Shapeways.  Other companies either don't have the "frosted ultra detail" material needed for fine detail, or their print resolution just isn't quite small enough.  Of course, I am very new to this myself, so there could be other alternatives that I am not aware of.  It is also free to upload a design to Shapeways, and then only when you wish to actually purchase a print, do you pay for their services.

So, while it seems straight forward to get an image in your head, onto a computer, and loaded to a printer at Shapeways, it actually takes some experience in design, understanding how to convert 1:1 scale to 1:160 without making detail or parts too small or thin, and modeling within the design specifications defined by Shapeways.  Again, I am still in the "don't know what I don't know" phase, so I am eager to learn more.

Here is an illustration of Sketchup, and a model that I am currently designing.  It is a 53' Wilson spread axle livestock trailer.  N scale desperately needs a modern livestock trailer, and I need a few for a planned industry on the Council Bluffs Sub.  I have high confidence that this will be a successful model like my grain trailer, however, my main concern is whether the printing process and resolution will be able to handle the numerous ventilation holes in the side skins of the trailer.  So, this will be a good test for me.  The belly dump trailer that I designed is much more conservative, and should turn out just fine.  I will know more this week when my first batch arrives.


Saturday, March 30, 2013

3D Printing - Preparing the Raw Print for Painting

I wanted to share some model preparation steps, since this is very important in getting a great finished product.  The raw print from Shapeways is transparent, covered in a waxy like residue, and in some cases can look rather rough.  I did some research on the internet to see what people were doing to prep these models, and what type of paint to use.  The following photos illustrate what I am doing, but don't necessarily mean best practice.

First, I use a bath of Bestine brand heptane to soak the model overnight.  I then pull them out, rinse them with water, and let them dry.  Here is where I have seen some variance in my Shapeways orders.  It is obvious after observing the raw prints, that items can be printed using different orientation.  I shared this in an earlier post, and will show some examples.  Since each item is printed from the bottom up in layers, the supporting material used to hold the existing layers together during printing can leave a less than ideal surface.  It's not until the heptane has done its job removing the waxy residue that this becomes apparent.  Here is a great comparison of the two Pete cabs that were printed in the same batch.  One cab is nice and smooth, and the other will require some prep work:


What am I using to get the surface of the model smooth and ready for paint?  So far, I have found that a sanding needle works well for corners and cracks, and a medium sized micro brush will remove most of the flaky residue that is left after the heptane soak.


As far as the rest of the Petebilt parts, the frame turned out well.  I added some detail, but decided to not go overboard since this is N scale.  There are simulated airbags, springs, and shocks on each axle.  


The grill/bumper part, and the air cleaner canisters are a perfect fit, and only require some minor cleaning where they fit into the cab component.  These are exceptional prints, and show just how much detail can be obtained.


Here is an example of a grain trailer right out of the Shapeways box.  It is transparent, and has a thick waxy coat.  After a bath in heptane, it becomes white like styrene, and the details can be more easily seen.  I am sharing a photo of the tire/rim sets to illustrate this best.


Overall, I am pleased with Shapeways and 3d printing in general.  As you can see, it is not perfect, and models with differing results can be frustrating.  However, I am making the best of this newer technology, and hoping that it will continue to improve over time.  Unfortunately, the orientation of the model during printing is out of my control, and Shapeways will not accept requests for specific orientation at this time.  This is a shared concern by many designers based on public discussions I have observed online.  

I have a few models available for purchase through Shapeways now, and more to come in the future.  If you purchase one of my models, please let me know about your results.  My intent is to purchase and finish every model that I design before making it available publicly to ensure that it turns out as intended.  
http://www.shapeways.com/shops/NScaleAddict


Wednesday, March 27, 2013

3D Printed 379 "Pete" Day Cab Straight Truck

The UPS truck arrived late today with one of my new 3D printed models from Shapeways.  I haven't done anything with the model yet but wanted to share it on my blog since I'm pretty excited about this one.  I have always been a fan of Peterbilt trucks, and wanted an N scale version for myself.  While GHQ makes a decent model, I felt that I might be able to design and print my own with a similar level of effort to customizing the GHQ model into what I need.

I have already shown photos of my 22' grain box and have them available for sale through Shapeways currently.   Well the photos below illustrate what I had in mind to hold up that box.

This a model designed after a 379 Peterbilt truck.  The frame was designed specifically for the grain box.  It features a tandem axle, with a third lift axle in the rear.  I designed it in the raised position.  The single fuel tank is representative of a short haul or farm truck.  The battery boxes, air tanks, and cab steps are all part of the frame and add to the integrity of the frame component.  The cab is a separate shell for ease of painting and detailing.  I designed the air filter canisters as separate details for the same reason.  The grill and bumper were designed as a separate component again for that reason.  If I want to swap out a custom grill or Texas style bumper for example, I can easily change that isolated piece.  Also, the individual pieces should aide in the painting process and provide a much cleaner finish between part lines.  The wheel and tire sets are similar to what I am using on my grain trailers. I put the little parts on a spruce for ease of handling.

You will notice that I have 2 cabs, with different style sunshades.  This is yet another great feature of model design and 3D printing.  I'm excited to get these to the paint shop.  My plan is to make multiple configurations of axles, fuel tanks, sleeper options, and other options.

This model is fresh out of the box, so you are seeing it at the same time I am.  I will have more feedback to offer once I clean the parts and test fit them together.  The raw prints still have the waxy residue on them, which make them difficult to see in photos.  Once these are soaked in heptane overnight, they will look like white styrene.  I will cover my steps to finish these models in more detail in future postings.

Tell me what you think.


Sunday, March 24, 2013

3D Printing - My New Addiction

I have been having a lot of fun designing N scale models for purposes of 3D printing.  I seem to have narrowed in on trucks and trailers currently, which not only represent a major void in N scale, but will also provide the greatest opportunity to enhance my future Council Bluffs Sub layout project.

I recently completed a design for a Trail King belly dump trailer, and am in the process of validating the actual printed results from Shapeways.  I liked this trailer for its open frame design, and because belly dump and side dump trailers would make great models for N scale construction scenes.  My specific model will feature 3 axles, and steel rims, which I modified from my original aluminum rim design used on my Wilson grain trailers.


Here is the 3D rendering on my Shapeways shop.  I haven't made it available for ordering, since I want to validate my design, and produce a finished model first.  This model has a lot of interesting design features that should result in a neat N scale model.  My Shapeways Shop: http://www.shapeways.com/shops/NScaleAddict


I shared in an earlier post that I had a tarped version of my 43' Wilson grain trailer in design.  Well, I finally completed it, and I have an order on it's way.  I'll share the final result in the near future.  This is the 3D rendering on Shapeways, and again, not available for purchase just yet.


Monday, March 18, 2013

My Shapeways 3D Model Store is Now Open!

I have been using a company called Shapeways to print my N scale models, and they not only offer printing services for individual designers, but in addition the general public can browse and purchase any items from their website (from various designers), make payment, and have the item printed on demand and shipped directly to them.  Over the past several weeks I have been uploading test files, and have received multiple printed models.  My 43' grain trailer was the first of a few designs that I have completed so far, and I am confident with the results to offer them to other interested N scale enthusiasts at this time.

A couple key points about 3D printing, is that it is somewhat expensive, and cost prohibitive in larger scales at the current time.  As with all technology, this will likely change over time.  In addition, the largest criticism that I have heard about 3D printing within the N scale community is the presence of surface texture, and lines from the "layering" of the model as the printer builds it up.  I personally have seen some very slight variation in models due to the orientation as they were printed, meaning that one model may have been printed right side up, while another was printed standing on its end.  This will cause variance between models due to the supporting material during printing.

In the end, there is a lot of great information on the internet regarding 3D printing.  I am far from being an expert, and am simply taking advantage of a great technology that allows me to design and create N scale models from my home PC.  I encourage you to find more about it if you haven't already.

My 43' grain trailer is now available for purchase through my Shapeways store.  I am making it available as a single unit, or a pair, for a slightly better price than buying two separately.  Look for more models being offered soon, and as I finish new designs.

Simply click on the following link and it will take you directly to my store:  http://www.shapeways.com/shops/NScaleAddict

I look forward to seeing your own completed grain trailers and other models in the future.  As always, please email me with any questions or feedback you may have.


Council Bluffs Sub - Update

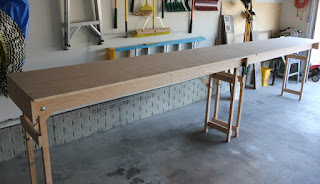
I've been focusing much of my N scale time on 3D printing projects, and the new layout was getting neglected.  Recently, I was able to spend some time on the two 8' bench work sections, and they are getting close to allowing me to start laying out some track designs and maybe some building mock ups.

Each section will be 8' in length, and about 20" in width.  I say "about" since the front edge of the layout will have about a 2" variation from end to middle, which can be seen on my track plan that I posted a few months ago.  In the photo below, some of the plywood overhang will get trimmed to the final dimension with a jigsaw.  The remaining overhang will create a recessed area below track level and on the fascia, which will accommodate my planned manual switch levers.  As of now, I plan to use slide switches mounted directly below each track turnout, with a length of piano wire extending vertically through the plywood base, and some type of horizontal connecting rod that will extend forward through the front edge/fascia, with a handle at the very end for manual control.  The slide switch is needed to route power to the frogs.  I used Caboose Industry ground throws on my very first N scale layout, and while they are fun to throw, they are over-sized. I wanted to keep the Council Bluffs Sub truer to scale, so decided against CI.

The backdrop pieces are cut and ready to install, however, I might leave them off until I get further in construction with the layout.  Being able to work from the front or the back of each table section is appealing.  I have caster wheels for each leg, and will be installing those soon too.

Unfortunately, I don't have a nice studio with sky blue walls like Model Railroader does to stage their project photos, so instead I get the wall of my garage.  At least I had some natural light when I shot these.

I hope to post a revised track plan soon as well, as I have a few minor edits to make.  I'm getting excited to begin laying out the design on my tables.


Sunday, March 17, 2013

22' Grain Box - 3D Printed Model

Although tractor trailers out number straight trucks for hauling grain now days, I still wanted a fleet of straight trucks to mix with my grain trailers.  Grain boxes have evolved over the years from wooden boxes with stock racks, to steel sided boxes, and most recently aluminum boxes.  My model represents a 22' aluminum box that would typically be found on a stretched frame semi tractor or similar style of straight truck, with a tandem rear axle, and many times extra lift axles to haul more bushels.  Much like my grain trailers, these boxes have tarp bows, and a simulated rolled tarp.  The design includes frame rails and cross members, and a 3 section rear gate.  I have plans to put a box on several different readily available trucks, and I am anxious to see how they turn out.  The GHQ 359 Peterbilt daycab and Freightliner cabover, the Athearn R model Mack, the Altas Ford 9000 could easily be candidates for a grain box, with a stretched frame and additional axles.  I had a dozen of these printed so far, and am pleased with the results.  The two pictured below have been painted with Polly S flat aluminum.  They still need tarp crank handles, and paint detail.  


Saturday, March 16, 2013

Lingering Forklift Project


A few months ago I shared some photos of 6 GHQ forklifts that I was assembling and painting.  Well, they are still waiting for me to finish them up.  As I was cleaning my work space to make room for 3D printed models, I decided to put them back into the "active" project mode.  In addition, a friend graciously sent me a forklift model that is ready-to-run out of the box, and I wanted to do a side by side comparison with the GHQ models.  The Aoshima brand forklift is 1/150th scale, so is just a bit large for N scale, but it isn't unreasonably sized.  I can certainly find a space for it on my layout, and offers a great alternative to the GHQ model.


Bob, when you see this posting, your two finished forklifts will be on their way to you soon.... I promise. :)

Friday, March 15, 2013

3D Printed Propane Tanks

Since I am new to 3D printing, I decided to design a few easy projects in order to get familiar with design software, the process of uploading files, ordering prints, and experimenting with different materials that Shapeways has to offer.  In order to get the fine detail for N scale models, it usually requires a material called frosted ultra detail, or FUD.  It is relatively expensive, and the final cost is determined by the volume of material used, plus a flat set-up fee.  My grain trailers are printed using FUD material.  For models that don't require fine detail, there are other materials that are less expensive, but may not produce a smooth surface for example.  I designed a 1000 gallon propane tank to use with switch heaters on my mainline.  Since I designed it to be a solid object as opposed to hollowing it out, FUD would have been unreasonably expensive.  I decided to try a cheaper material called white strong and flexible polished.  They turned out really nice, but do have a minor rough surface.  The "polished" part of the material is a process where Shapeways takes some of the roughness off the surface.  Otherwise they do offer a plain white strong and flexible without the polishing.

Anyway, here are some photos of the results.  I ordered a dozen just to see how they would turn out.  I am quite pleased with their shape.  I plan to paint them to seal the material and put them in my details bin until I need them for a future layout.


Here is a comparison of the new 3D printed propane tank and my original scratch built tank behind it, created from a 1/4" wooden dowel, rounded on the ends, with a piece of sprue added for the dome.


Wednesday, March 13, 2013

Bigger is Better

A couple months ago when I began to explore our N scale truck offerings in more detail, I already knew that it was sparse, but there are a few bright spots if you look hard enough.  Kato did us all a favor when they produced their Volvo tractor, for the modern modelers.  I don't own anything but Kato locomotives, and have become accustomed to the incredible detail and crispness of their models.  It wasn't until I began designing my own models for 3D printing that I found a fairly major shortcoming.

Illustrated below is a Kato Volvo tractor, an Atlas Ford 9000 tractor, and one of my own designed and printed set of rims and tires.  Common wheel sizes for rigs today are 22.5" and 24.5", with a matching sized tire.  I based my design off of an Alcoa 24.5" rim.  I know that my tires are perfectly scaled to 1/160, since I drew them life size, and then scaled them down for printing.  You can see that the Ford 9000 has a tall tire that is about right for that truck.  It's the Volvo that makes me cringe.  If you compare the out of the box rims and tires, they are dwarfed by my version.  I have taken a close look at the Volvo to see if I could get my set of tires under the fender wells, but I don't think there is enough room.  Oh well, I guess I can look past this flaw, but it is pretty obvious when hitched to a trailer with appropriately scaled tires.

We do have plenty of "not quite right" models in our scale, but I would rather have the model with its flaws than no model at all.  That is what I am learning with 3D printing.  It isn't perfect, but brings models into existence that in the past we only prayed and hoped some N scale manufacturer would produce for us.  Now I can personally do something about these model voids.


Tuesday, March 12, 2013

Grain Trailers - 2 More Versions

The great part about grain trailers, and trucks in general, is that there are many different variations, even within the same brand.  Once I had my 43' Wilson grain trailer design, it wasn't too difficult to modify it to create other models.  My 43' design represents a 66" side wall, tandem axle, which is fairly common in the Midwest.  By stretching the design, I was able to create a 50' trailer with a 72" side wall.  Then, by making a tweak to the suspension, I was able to create a spread axle version and tri-axle version.  These are fairly common as well, for hauling different commodities, and optimizing weight distribution, while meeting differing state DOT regs.

There just aren't a lot of straight trucks around anymore, as farms get bigger, and crop yields continue to grow.  Also, aluminum trailers greatly out number steel trailers mainly due to the extra weight of steel.

I am currently working on tarped versions of all three of these trailers, so I should have a good mix of models to choose from for my fleet.  This project kinda feels like lumber load deja vu.  

Here are all 3 versions: the 43' which is painted, and the other 50' spread axle and tri-axle, cleaned and ready for primer.


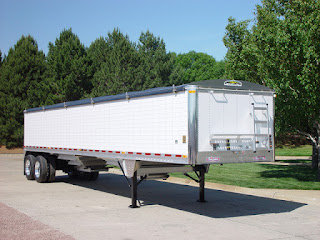
Here are some reference photos of Wilson grain trailers.  Another nice twist to this model is that it comes in 3 different skin colors: white, black, and titanium.  Then there is the choice of color for the tarp.  And of course it can come with aluminum rims, or a cheaper steel rim option.  Oh the options are endless....


Got Grain? N Scale 43" Wilson Pacesetter Grain Trailer

What the heck is 3D printing?

It seems like I am never content without having lots of projects going at the same time in this hobby, so a couple months ago I decided to explore 3 dimensional printing.  Fast forward to now, and I have my first proof of concept model in final paint.  Knowing that I would need a fleet of grain trucks for my future grain elevator, I decided to design my own to plug the enormous void that currently exists.  "Big enough to drive a Mack truck through" pun intended.  I personally haul grain with a 43' Wilson Pacesetter that dad owns for farming, so that is where I decided to start.


My N scale grain trailer version, like the one pictured above, is a common 43' aluminum grain trailer made by Wilson.  I designed it with ag hoppers which have greater ground clearance for unloading augers and operating in fields.  It has a shur-lok rolltarp in the rolled position.  Elevators sample all grain that gets unloaded, and they usually have a remote operated probe located after the weigh scale.  Also, many truckers leave the tarp rolled open on short hauls when returning empty.  So it made sense to make my trailer with an open top.  I do have a tarped version in the works however.  I designed my own 24.5" aluminum rims and tires, Wilson logo mudflaps, DOT striping, ladder and end platform detail, tarp bows, tarp handle (brass wire), air-ride suspension detail, and finally Polly S aluminum and Reefer White paint.

Everything except the tarp handle and axles is 3D printed.  The rim/tire sets were printed as separate pieces and mounted to a short piece of piano wire for the axle.  The mudflaps are paper.

Anyway, now that I am satisfied with my initial results, I thought I would share what I came up with so far.  I see a lot of potential with 3D printing, and hopefully you will see many more models from me in the future.  3D printing is not perfect, and it seems there is quite the controversy about whether 3D print quality is suitable for N scale.  So take a look at my 43' Wilson grain trailer and let me know what you think.  Sorry for the less than ideal ford 9000 tractor, but I needed something with a 5th wheel.  I have a project in the works that should remedy that problem.  Keep in mind that this is my first model, so I am still working on perfecting the painting process.  For example, I am not completely satisfied with the paint on the red tarp.  It may require some additional attention.


Thursday, March 7, 2013

Mar/Apr 2013 N Scale Railroading

Part 9 of my Marias Pass project was just printed in the latest issue of N Scale Railroading.  A shorter article this time, illustrating how I created the station at West Glacier.  Next article will show the snow shed in detail, and is one of my favorites in the series.


Monday, March 4, 2013

N Scale Trucks (a major gap in N scale)

I did not intend to go dark for this long before posting something new and exciting, however, time has certainly slipped away from me already in 2013.  In anticipation of my new layout design moving into construction soon, I have been fully aware of the need for all kinds of trucks to service the industries that I have chosen to model as part of the Council Bluffs Sub.  Some if not all are not available in N scale, or available, but not from the modern era, or needing some alterations.  At the train show earlier this year, I stumbled upon a couple Chevy truck kits that were being sold by one of the vendors.  The model is a late 70's early 80's Chevy C60/C65 truck, and they come in various configurations.  I wasn't sure if the company was still around, but I did some research, and sure enough, C in C Precision in Miniatures does still exist, and has a website.

Anyway, the multitude of trucks that I am needing for my industrial layout includes flatbeds for lumber, grain boxes, grain trailers, cement trucks, rock/sand trucks, etc., etc., etc.  Although the C60/65 chevy is a couple decades old, I figured it would make a good grain truck, as this was a common model for that use.  While most grain is hauled via tractor trailer today, there are still a lot of straight trucks used for field to local storage trips, and short hauls.  Our family farm actually has two, an International cabover, and an R model Mack.

My plan is to stretch the frame on a couple of these trucks, add a tandem axle and drop a grain box on it.  Where is the grain box coming from?  Well that is what is consuming much of my modeling time lately.  I am moving into the world of 3D printing, and I am finding a lot of potential for me personally, and N scale in general.  More to come on that in the future.

Here is an example of the C in C packaging, and the  C65 single axle tractor which I have cleaned up and is ready for paint and assembly.  This one I'll keep as a tractor, as I have specific plans for it.  The grain elevator will be a prominent structure on my new layout, so grain trucks are high on my list.