Showing posts with label General Model Railroading. Show all posts

Monday, July 21, 2014

A Whole Lotta Nothin'

For those of you that have been scanning the obituary lately looking for "N Scale Addict", I apologize for the lack of communication in the past several weeks.  Summer has gotten in the way, and I guess you could call it somewhat of a "detox" from n scale.  While I have a passion for the scale, even I find that an extended break from time to time provides a fresh start to the intense projects that I seem to find myself undertaking.  I have many other activities that demand my time, and other interests (addictions) that steer my focus, time, and energy.

Anyway, recently, the n scale addiction has begun to creep up on me again, and I find myself at least thinking about the highs that I get when I'm drawing in Sketchup, putting a coat of paint on a new model, or designing a new layout.  It almost makes me want to snort some lightweight rock casting hydrocal, or smoke some woodlands scenics static grass.  Kidding of course.

The only updates I can provide tonight are that my Pete 389 and Kenworth K100 are available for sale on Shapeways.  I have been meaning to finish a model myself and take pictures, but obviously that hasn't happened yet.  So if you feel the urge to add a new truck model to your fleet, please don't let me stand in your way.  I also made my Fontaine drop deck and East dump trailer available as well.

www.shapeways.com/shops/NScaleAddict


Monday, December 2, 2013

Photography & Model Railroading

I have taken probably several thousands of photos related to model railroading over the past decade, and many of them for the sole purpose of magazine article material, and more recently this blog.  Even then, I still feel that I am a fresh amateur, and getting good shots isn't always easy.  There is a lot of middle space between a great photo and a bad photo, and I guess it just takes a lot of practice and a keen eye for quality to become good.  I recently purchased an inexpensive light box and set of lights, since I have been taking so many photographs of my n scale 3d printed trucks and trailers.  The current set up was staging my vehicles on an oak plywood surface and simply using the fluorescent lights on my garage ceiling for the light source.  The photo quality was decent, but didn't provide enough light where I wanted it.  I set my light box up tonight and tried it out, and wanted to share the results.  The set I purchased came with 3 small lights, so I have one aimed inward from both sides and the top.  It wasn't very expensive, so I thought it was worth a try.  Eventually I would like to have a small permanent studio for staging my photos, which will help me maintain consistency with light and camera settings.

My initial reaction was that the white material was too thick and not letting enough light through.  There is a double layer of material over a wire frame, so I could easily cut a hole in one layer, and reduce the thickness by half.  The lights seem to provide a satisfactory amount of light.  I may build my own box, with brackets to hold the lights, so it can be easily moved as a single, mini studio.  Overall, I think the camera did a nice job.


By the way, I know that my row crop duals have the tread pattern running the wrong direction.  That bracket is a separately printed component, and hasn't been glued permanently in place yet.  It just needs to be turned around.


Monday, May 20, 2013

A Chapter Ends, A New Chapter Begins - Saying Goodbye to Marias Pass

With bittersweet emotion, the Marias Pass is now out of my possession, and moving east several hundred miles to its new home.  Of all my layouts to date, this by far has been the most special, for many reasons.  The timing of this sale is interesting, as the last installment of my article series in N Scale Railroading will be published in just a few weeks.  I can't believe how much time has passed since I sold my Orin Line, and at the time had only a frame with legs which would later become the Marias Pass.

I am also very excited to begin focusing attention on my Council Bluffs Sub, which is also just a couple of frames with legs, and has been resting against the wall until now.  I need a break from my 3d printing projects, and spending some time on the initial construction of the new layout will be a nice change of pace.


Eastbound and Down....


Monday, March 18, 2013

My Shapeways 3D Model Store is Now Open!

I have been using a company called Shapeways to print my N scale models, and they not only offer printing services for individual designers, but in addition the general public can browse and purchase any items from their website (from various designers), make payment, and have the item printed on demand and shipped directly to them.  Over the past several weeks I have been uploading test files, and have received multiple printed models.  My 43' grain trailer was the first of a few designs that I have completed so far, and I am confident with the results to offer them to other interested N scale enthusiasts at this time.

A couple key points about 3D printing, is that it is somewhat expensive, and cost prohibitive in larger scales at the current time.  As with all technology, this will likely change over time.  In addition, the largest criticism that I have heard about 3D printing within the N scale community is the presence of surface texture, and lines from the "layering" of the model as the printer builds it up.  I personally have seen some very slight variation in models due to the orientation as they were printed, meaning that one model may have been printed right side up, while another was printed standing on its end.  This will cause variance between models due to the supporting material during printing.

In the end, there is a lot of great information on the internet regarding 3D printing.  I am far from being an expert, and am simply taking advantage of a great technology that allows me to design and create N scale models from my home PC.  I encourage you to find more about it if you haven't already.

My 43' grain trailer is now available for purchase through my Shapeways store.  I am making it available as a single unit, or a pair, for a slightly better price than buying two separately.  Look for more models being offered soon, and as I finish new designs.

Simply click on the following link and it will take you directly to my store:  http://www.shapeways.com/shops/NScaleAddict

I look forward to seeing your own completed grain trailers and other models in the future.  As always, please email me with any questions or feedback you may have.


Saturday, March 16, 2013

Lingering Forklift Project


A few months ago I shared some photos of 6 GHQ forklifts that I was assembling and painting.  Well, they are still waiting for me to finish them up.  As I was cleaning my work space to make room for 3D printed models, I decided to put them back into the "active" project mode.  In addition, a friend graciously sent me a forklift model that is ready-to-run out of the box, and I wanted to do a side by side comparison with the GHQ models.  The Aoshima brand forklift is 1/150th scale, so is just a bit large for N scale, but it isn't unreasonably sized.  I can certainly find a space for it on my layout, and offers a great alternative to the GHQ model.


Bob, when you see this posting, your two finished forklifts will be on their way to you soon.... I promise. :)

Friday, March 15, 2013

3D Printed Propane Tanks

Since I am new to 3D printing, I decided to design a few easy projects in order to get familiar with design software, the process of uploading files, ordering prints, and experimenting with different materials that Shapeways has to offer.  In order to get the fine detail for N scale models, it usually requires a material called frosted ultra detail, or FUD.  It is relatively expensive, and the final cost is determined by the volume of material used, plus a flat set-up fee.  My grain trailers are printed using FUD material.  For models that don't require fine detail, there are other materials that are less expensive, but may not produce a smooth surface for example.  I designed a 1000 gallon propane tank to use with switch heaters on my mainline.  Since I designed it to be a solid object as opposed to hollowing it out, FUD would have been unreasonably expensive.  I decided to try a cheaper material called white strong and flexible polished.  They turned out really nice, but do have a minor rough surface.  The "polished" part of the material is a process where Shapeways takes some of the roughness off the surface.  Otherwise they do offer a plain white strong and flexible without the polishing.

Anyway, here are some photos of the results.  I ordered a dozen just to see how they would turn out.  I am quite pleased with their shape.  I plan to paint them to seal the material and put them in my details bin until I need them for a future layout.


Here is a comparison of the new 3D printed propane tank and my original scratch built tank behind it, created from a 1/4" wooden dowel, rounded on the ends, with a piece of sprue added for the dome.


Saturday, February 2, 2013

GTE 2013 - Day 1

So I guess that having a portable layout has its pros and cons.  A pro is that I can arrive at the train show the morning of, roll in the Marias Pass, plug it in, set up a train, and be running in a very short time.  A con is that by the time I arrive, everyone else has set up the night before, and even though I have a reserved space on the floor, I wind up getting squeezed out, and finally set up next to the electrical closet, in the corner of the arena.  I guess it wasn't all bad in that I was next to a few other layouts, had a fairly quite corner, isolated from the crowd, but still accessible to spectators.  I had a nice day and talked to some really nice train enthusiasts.

This will likely be the last show that I personally display the Marias Pass, so I am glad I made the effort to haul it over.  The weather was cold but dry, and the Mid America Center is still a great venue for a train show.


Monday, January 28, 2013

Great Train Expo 2013 - Council Bluffs, IA

It's been over a month since I have posted here, but it hasn't been due to a lack of any railroading.  I have some projects underway that I will share when the time is right.  On a separate note, it's that time of year again, when the GTE comes to Omaha/Council Bluffs, and typically in the past I have taken a layout if I was finished with the project.  This year I am actually going to be able to take the Marias Pass to its 2nd train show.  I offered the layout for sale several months ago, and while it has been spoken for, I have the benefit of holding it while arrangements are made to move it to it's new home in the future.

The GTE is this coming weekend at the Mid America Center in Council Bluffs, so early Saturday morning I'll be driving the Marias Pass across the river to set it up.  Last year I transported it in the minivan, and while it may seem impossible when looking at the layout and then looking inside the van, I will just say that I have seen 15 clowns get out of a small car before.  Same concept.

This year I plan to use a new aluminum stock trailer from the family farm, which will protect it well during the 20 mile trip.  Although it fit in the van fairly well, it stuck out the back about two feet.  I had a protective cardboard box that I built to protect it from wind and road grime.

Anyway, I thought I would share some photos from last year, as I prepare the layout for this year's show.  Not much has changed other than it is a year older, and I have some different rollingstock to operate this time around.

Please stop by and say hi if you attend the show.  This will be the first year that the layouts and vendors will be set up in the arena rather than the two exhibition halls.


Thursday, December 20, 2012

Atlas & Micro Engineering Code 55 Track Comparison

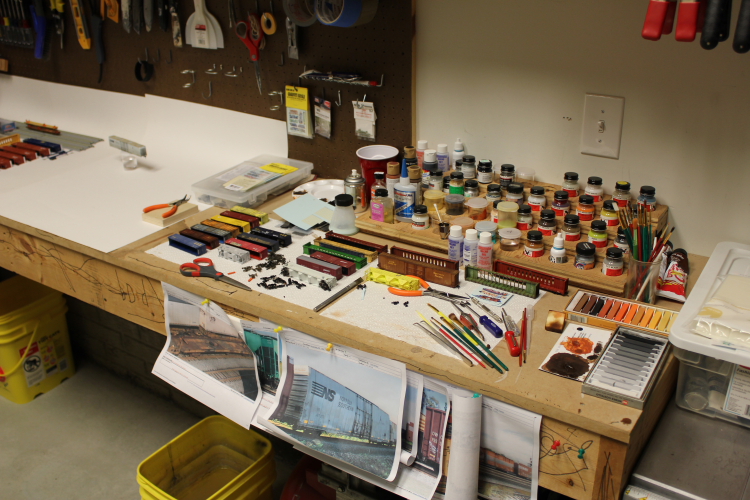
I have people ask me on occasion about what track I use for my layouts.  I don't recall the exact timing of the release of Atlas code 55, but it was prior to starting my first N scale layout which would have been around 2002.  I have used Atlas code 55 flex track and turnouts exclusively on all 4 completed layouts to date.  The exception is the concrete tie flex track made by Micro Engineering which I used both on the Orin Line and Marias Pass layouts.  Altas released their #10 turnout prior to the construction of the Orin Line, which was a great addition, especially for better looking cross-overs.  Micro Engineering also makes code 55 flex track with wooden ties, however, I have not used it.  I did use a 36" length of ME flex track with bridge ties on the Marias Pass, and was very pleased with the product.

There are differences between the Atlas and ME code 55 track.  While the rail is very similar in shape/profile, the tie spacing and thickness are quite different and must be accounted for when mixing the two different brands together.  The ME flex track also comes in weathered and non-weathered rail.  This is also important.  The Atlas flex track can simply be painted the same color (ties and rail) since it has wooded ties.  The ME flex track on the other hand requires a very steady hand if you wish to paint the rail, but not the concrete colored ties.  For this reason, I like using the weathered rail.

I submitted an article that was published in the Jul/Aug 2009 N Scale Railroading that illustrates the differences between Atlas and ME code 55, and further discussed the ME concrete ties to build a modern looking mainline.

Here you can see the difference in tie thickness between the Altas and ME code 55 flex track.  The difference in rail height must be accounted for when mixing the two brands.  I used a styrene shim under the Atlas flex track to raise the height by about 0.30" to match the ME rail height.  The same shimming is also needed when using an Atlas code 55 turnout next to ME code 55 flex track.


I used ME code 55 with concrete ties on my mainline, while using Altas code 55 turnouts and flex track on a third track/siding on my BNSF Orin Line layout.  The mixing of concrete ties and wooden ties provided a unique modeling opportunity, and suggests that the railroad is in the process of updating their track work over time.  


On the Marias Pass, I used ME code 55 flex track with bridge ties, to span the Flathead River.  On one end, the bridge track connected immediately with ME code 55 with concrete ties.  On the other end, I needed a short section of Atlas code 55 with wooden ties, before entering into a #10 turnout.  One trick I used is that instead of putting railjoiners at the point where the bridge track and concrete track meet, I used the full 36" of bridge flex, and removed the last several inches of bridge ties and replaced them with concrete ties.  This moved the railjoiners down the line several inches and actually into a tunnel where they were hidden.  Less gaps and railjoiners means better, smoother track and operation.


On the other end of the bridge, instead of having railjoiners at the end of the bridge track, and then again at the turnout, I simply used a full length of rail from the bridge tie flex track, removed about 4" of bridge ties, and replaced them with Atlas code 55 wooden ties.  This way, I eliminated one set of railjoiners to make smoother track work.


Sunday, December 9, 2012

Jan/Feb 2013 N Scale Railroading Arrived

The "2013" on the most recent copy of N Scale Railroading reminded me that 2012 is almost over, and the Marias Pass series is close to the home stretch.  In part 8 of the series I discuss trees.  The Marias Pass has over 1200 total trees on it, and makes me appreciate those southwestern desert landscapes, where vegetation is scarce.


Tuesday, December 4, 2012

Trying out a New & Free Software for Model Railroading

I have been studying various articles and information about using photos in model railroading to create backdrops, buildings, and other things.  While Adobe Photoshop is a fairly common software for photo manipulation, it is also quite expensive.  I discovered a free software called GIMP that does many of the same functions as other software that you have to purchase.  I downloaded GIMP tonight and started playing around with it.  I know nothing about this software yet, so I literally dropped some photos in and began trying some functions.  There are a lot of helpful resources online and I hope to begin learning some of the capabilities soon.  In about 30 minutes, I was able to stitch together a few shots that I took a couple of months ago.  The idea at the time was to see if I could create a panoramic image that might be suitable to print as a backdrop.  So far, I feel like I have the tools needed to do some really cool stuff.  Of course, I have a lot to learn.

If anyone has any experience with this type of stuff, I would love to hear more about how you apply these techniques to your own model railroading.

This is what I created tonight in about 30 minutes.  Not bad for never using the software before.  I simply rotated the photos a bit since I have a bad habit of not holding my camera level.  Obviously there is some color work that needs to happen, but it sure looks promising.  Yet another application of technology in N scale.  That is why I love this hobby.


Wednesday, November 28, 2012

N Scale Pallets - What a Great Find

I have been interested in finding some details to go with my GHQ forklift kits, and did some searching for a nice N scale pallet.  I found a source from pawofabear.com and based on the photos decided that their model appeared to be the most accurate replica, and bought a couple of kits.  The kit comes with enough material to make 45 pallets, or 90 skids, in 3 different sizes (15 of each pallet or 30 of each skid).  The instructions are well written and easy to follow, and I was able to make a set of pallets in a short time.  I used a straight razor blade to do the cutting which worked well for me.  What I like most about this model is that it is a true replica of a pallet, with top and lower decking, and the 3 stringers tying them together.  Although it does take a steady hand and some time to assemble them, they look much better than a one piece version or molding, in my opinion.  If you are looking for a great n scale pallet, check these out, I don't think you will be disappointed.

As far as my forklift project goes, I still have some work before they are complete.  Now that I have some pallets built, I can attach the remaining forks at a width that will slide into the pallets.


Saturday, November 17, 2012

N Scale Forklifts Nearing Completion

My forklift project is progressing nicely.  I painted the tires and wheels, and installed the roll cages on all of them.  I still need to add the operator at this point.  Since the kits come with extra parts, I decided to take an extra operator and see if I could cut the seat and steering wheel from the casting.  Using a sharp hobby knife I was able to make a separate seat and steering column without a lot of trouble.  You can see them in the nearest forklift in the photo below.  It looks more appropriate for a machine at rest, parked while not in use. The last steps will be adding the forks and then applying some weathering to make them look used.


Wednesday, November 14, 2012

GHQ Forklift Project is Progressing

I have made some progress on my half dozen GHQ forklift kits.  Although I painted them all yellow, I plan to make variations within the set so they aren't all the same.  I am seeing a lot of typical forklifts with a yellow body, black roll cage, black mast and forks, and different color rims.  I decided to do white rims on the first.

The kit comes with a seat, steering column, and operator all molded as one piece.  I don't mind having the static operator in a couple of the forklifts, but would also like at least a couple of them to have an empty seat so I can simply "park" them in an appropriate location next to a building for example.  I think I can make a seat easy enough, by using some styrene, painting it black, and fixing it to the body where the original seat would go.  However, I don't know what I could use for a steering column and steering wheel?


This one still needs an operator added.  I'll probably weather these a bit once they are done to give them a used appearance.  The yellow is UP Armor, the mast and roll cage are flat black, the tires are grimy black, and the rims are reefer white.


Saturday, November 10, 2012

N Scale GHQ Forklift Project

It's November, and as I was driving today, my thermometer read 80 degrees at midday.  It was crazy windy however.  Tomorrow the high is only 35, and it is raining as I type this.  Wild weather!

Anyway, I have had several N scale GHQ forklift kits waiting to be assembled and painted, and last night I finally got them out.  I have a total of six kits, but a couple are for a friend.  They are fairly easy to assemble since there aren't many pieces to each forklift.  Each kit comes with two masts so that the final model can have the forks in a lowered position or a raised position.  I chose to model 3 of each.  

Last night I spent some time cleaning up the metal parts and attaching the masts to the main body, which is one piece.  Tonight I airbrushed each of them with UP Armour Yellow Polly S acrylic.  

So far they are turning out nicely.  The detail is crisp, and the level of effort so far has been minimal.  


Sunday, September 23, 2012

Photo Gallery is Growing... 1600+ images

I have been busy the last couple days moving copies of hundreds of images to my online Picasa photo albums.  I upgraded my Canon Rebel DSLR about a year ago, and the first DSLR had taken about 10,000 photos.  While it is the "family camera", I am guessing a majority of those photos were railroad related.  My new DSLR has well over 2000 photos including about a hundred videos already.

Many of these photos have already been featured within my blog postings, but many have not.  Many are simply duplicates of the same object, just taken at different angles or exposure.

I hope you enjoy viewing my gallery and maybe something will inspire you to start a project of your own.  Stay tuned for lots more photos, both of existing and future work.

The N Scale Addict

www.nscaleaddictionphotogallery.blogspot.com 

Sunday, September 16, 2012

New Blog! N Scale Addiction Photo Gallery

My new blog is now live!  www.nscaleaddictionphotogallery.blogspot.com

I recently decided to build a new complimentary blog as a dedicated photo and video archive of my N scale projects and prototype trips.  I have collected thousands of photos over the years, and want to share them with fellow N scale enthusiasts.  

Over the next several weeks, I will begin building and organizing my albums and making them public via my new blog.  I will continue to post frequently here with my ongoing projects.

N Scale Addict


Wednesday, September 12, 2012

New Project: Deloney's Barn Laser Kit

Years ago I discovered a rustic barn made by Showcase Miniatures, and considered the kit for a scene on my Orin Line.  I never purchased a kit, so obviously it never made its way onto the Orin Line.  Driving through Western Nebraska on a family trip just before Labor Day, gave me some inspiration for some possible projects, and just maybe the setting for my next layout.  Being born and raised in the state of Nebraska, there are some attractive modeling possibilities for either the BNSF or the Union Pacific, in either a dry western plains setting, or a more productive cornbelt setting.  Either way, I have lots of ideas, and came home from the trip ready to pursue them further.

I revisited the Deloney Barn, and decided to buy a kit.  It would make a very nice Western Nebraska ranch scene, perhaps as part of a transition from pivot irrigated crop land to rolling sandhills.  It came in the mail today, but I may put it aside for awhile before I actually build it.

Anyway, I thought it was worth mentioning, as it appears to be a great little kit, with multiple applications.

If anyone has built this kit and has some suggestions, I would love to hear from you.


Wednesday, June 13, 2012

Jul/Aug 2012 N Scale Railroading Arrived

I received my contributor copy of the Jul/Aug 2012 NSR in the mail the other day.  Part 5 of the Marias Pass series covers hard shell scenery.  Unless something changes, there will be 11 total parts to this series.  As I reflect on the Marias Pass layout and the work involved to write content and select appropriate photos and captions for the articles, it is really enjoyable watching the whole thing come to fruition when I go to my mailbox every other month.  Being a contributor is a lot of work, but very fulfilling as a modeler.  It also represents a large percentage of the small fortune that I have spent on my hobby over the past few years.  N Scale Railroading has been very good to me, and I will be a loyal contributor and subscriber for years to come.  I would encourage anyone that has a passion for the hobby, some decent writing skills, and a fairly new digital camera to capture some work and share it with the magazine and other N scale enthusiasts.  Or, simply being a subscriber is worthwhile enough.

Having my material represented alongside Mike Danneman's work in the past few issues has been a privilege.  Of course the other contributors do some amazing work too.

Wednesday, June 6, 2012

My N Scale Work Space

What does the working space of an N Scale Addict look like?  For me, it's rather simple and unexciting.  I have a shared space in my garage for my hobby as well as all of my other "man" stuff, which is mainly tools.  It works well since I don't have to worry about spilling paint, making a mess, or using chemicals since I can open the garage door.  It does get uncomfortable in the summer and winter, but I have the ability to move some projects inside as needed.  My air compressor sits under the bench and is a convenient source for my airbrush.  I have a few sheets of poster board next to my working space where I take many of my "object" photos in front of the white background.  I like to print pictures of rollingstock and use them as reference material for my weathering projects.  I simply tack them up in front of my working space.  You can see photos of the grey NS boxcar and RTTX flatcar that I have been working on recently.  As you can tell, I have a lot of projects stacking up, and that is only a small number of the items overall.  All of my other layout building supplies and tools are on shelves on a different wall.  I have plenty of stuff to keep me busy.

Some day I may have a nicer, dedicated studio for my hobby, but for now it works, and I won't complain.