What I have found is that primer works very well on the truck body and cab, but will just build up on the details on the wheels. So for my aluminum wheels, I use a rustoleum spray can and paint a couple of coats directly on the raw print. For steel rims, I still use primer, and then hand paint the rims whatever color I want.
What about timing of tires and wheels? Well, I find that painting silver first, and then hand painting the tire black yields the best results. I have designed the front tires with an exaggerated rim where it meets the tire so that a steady hand with paint brush can flow the paint right up to the rim and leave a nice crisp line between tire and wheel. The rear wheels are a little easier in that I just use a silver Sharpie marker around the inside of the rim to make a perfect line between rim and tire.
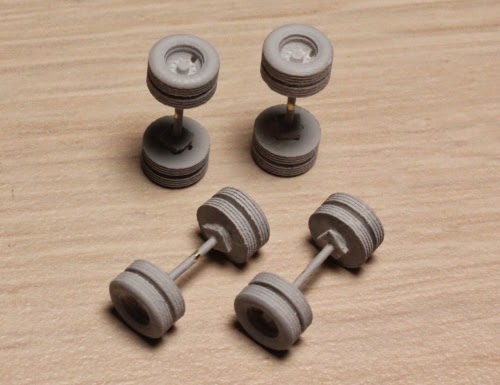
As I have posted before, my recent design revisions to place the wheels in a square pattern on the sprue rather than a straight line has seemed to influence the print orientation. I am getting my wheels printed flat now, which results in very clean prints. As you can see in the photos, the lug nut detail is present on all wheels. Take a look at my Kenworth T2000 and you will see that the quality of my wheels has come a long way from the early days.


No comments:
Post a Comment